Golf Clothing Size Charts: Compare Garment Measurements Instead of Labels
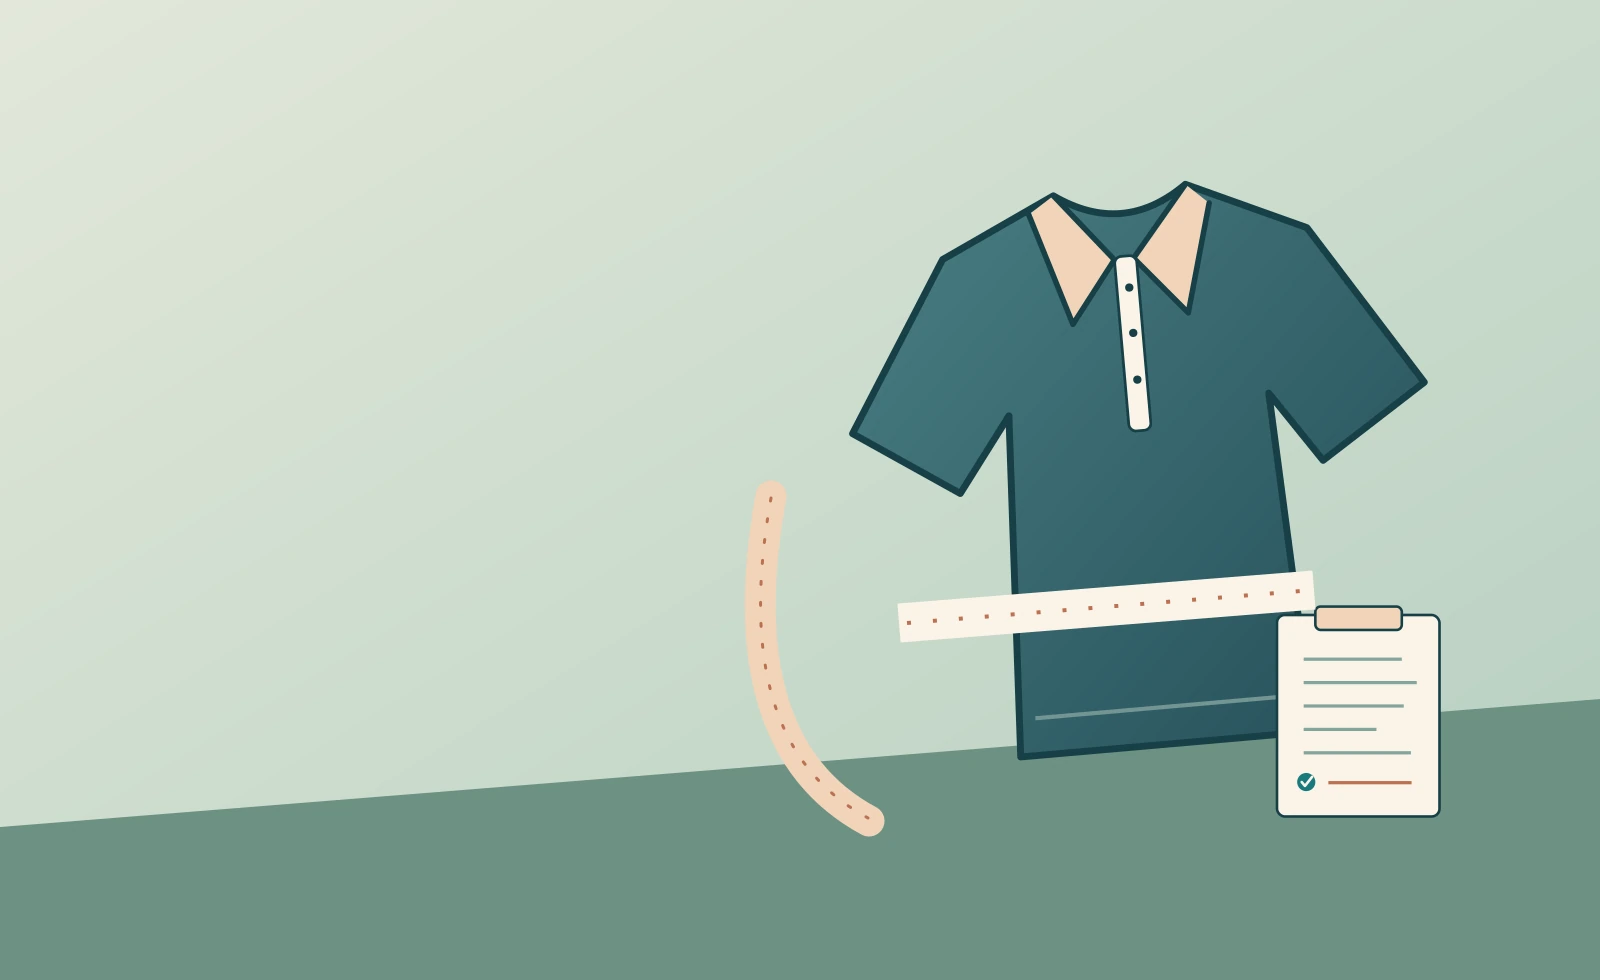
Separate wearer measurements, finished clothing dimensions and the label on the hanger.
Original conceptual illustration; not a product-test photograph.
Golf clothing size charts are useful only when you know what their numbers describe. A chest figure might refer to your body, the circumference of a finished polo shirt or a flat measurement taken across that shirt. Those are different things. Comparing them as though they were identical can turn a sensible purchase into a frustrating exchange.
The better approach is to keep two records: your body measurements, taken by the relevant brand's method, and the dimensions of a comparable garment you already enjoy wearing. Use the first to interpret a body-size chart and the second when a seller supplies actual garment measurements. Then check the cut, fabric and intended layers before choosing the label.
This guide explains that process for golf polos, midlayers, jackets, trousers, shorts and skirts. It is research-led buying guidance rather than a claim that every brand fits a particular way. The measurement examples are invented to explain the arithmetic; they are not specifications for products you can order.
Body or garment?
Identify what the number actually measures.
A comparable item
Use a comfortable polo for a polo, not a loose sweatshirt.
Like with like
Sleeve starts, chest widths and length paths must match.
The complete outfit
Try the planned layers and ordinary movement indoors.
Golf clothing size charts: identify the three different numbers
A body chart describes the wearer
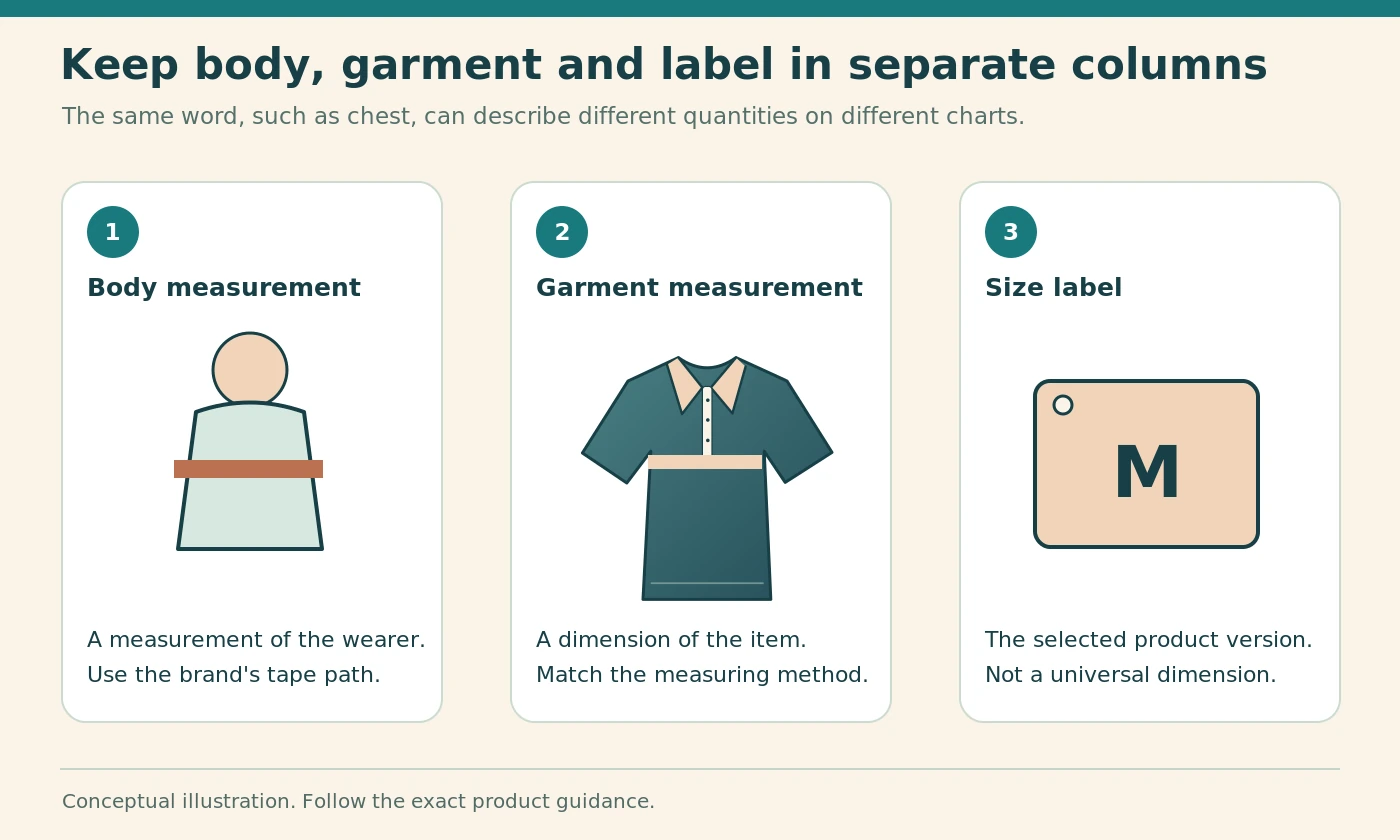
A body-size chart links a size label to measurements taken around or along your body. The garment has been designed to fit someone within that description, but the chart does not necessarily reveal the finished garment's dimensions. Do not expect the shirt itself to have exactly the same chest circumference as the body figure.
Galvin Green's current guide explicitly distinguishes body measurements from garment measurements in different sections. That distinction is more useful than assuming every table on a clothing website follows one convention. Read the heading above the particular table you are using, not just the page title. [1]
A garment chart describes the clothing
An actual garment measurement describes a particular dimension of the item. It might be a flat chest width, a complete waistband circumference or a back length. You still need the measurement method, because two sellers can measure a seemingly similar dimension from different points.
The size label is the third number or code. It identifies the selected version; it does not explain the first two. Keep label, body measurement and garment measurement in separate columns in your notes. This simple separation prevents most of the misleading comparisons discussed below.
Comparison framework, not a generic brand conversion table. Follow the selected product's definitions.
| Number on the page | Compare it with | Do not assume |
|---|---|---|
| Body chest circumference | Your body measured by that chart's method | That the finished shirt has the same circumference. |
| Flat garment chest width | A reference garment measured at the same points | That the flat number equals your body circumference. |
| Sleeve length | The same starting and finishing points | That shoulder-to-cuff equals centre-back-to-cuff. |
| Size label | The exact brand, model, cut and regional system | That another brand's matching label fits identically. |
Choose a reference garment that solves the same problem
Compare like with like
Start with a polo you like when shopping for a polo, rather than a loose sweatshirt or a close-fitting base layer. For an outer layer, choose a reference that works over a similar combination of clothing. An excellent summer-shirt measurement may be a poor target for a waterproof jacket.
Use an item that fits well now. A favourite garment that has become uncomfortable is not a reliable template just because you remember liking it. Write down what works: chest room, shoulder movement, sleeve position, body length and the way it sits when you bend or reach.
Record its condition
Note whether the reference is new, repeatedly washed, altered or noticeably stretched. Its current measurements can still help you, but they describe that actual item rather than a brand's original specification. A shortened hem is particularly important when comparing length.
Place the garment on a clean, flat surface and smooth ordinary folds without pulling the fabric into a larger shape. Fasten it as appropriate for the measurement being taken. Repeat the measurement once so that an accidental fold or angled tape does not become your permanent reference.
Take body measurements using the destination chart
Follow its tape path
Use the instructions supplied with the size guide. A chest, waist or hip figure is meaningful only if you measure at the location the guide expects. For example, a natural-waist measurement should not quietly become the circumference where your favourite low-rise trousers happen to sit.
Galvin Green describes body measurements at the fullest chest and hips, the natural waist, and defined arm and inseam paths. Other charts should be read on their own terms rather than treated as interchangeable diagrams. Record the method next to the result when a measurement is unfamiliar. [1]
Keep the measurement comfortable and repeatable
Hold a flexible tape level where the instructions call for a circumference. Avoid pulling it tight to obtain a preferred size or adding extra room by leaving it loose. Any intended wearing allowance belongs in the garment design or a clearly stated fitting instruction, not in an undocumented change to your body measurement.
A helper can make awkward measurements easier. However, the helper still needs the same starting and finishing points. Write the unit in full or use an unambiguous abbreviation beside every result; a bare number is surprisingly easy to misread when moving between websites.
Measure a polo's flat chest width correctly
Label a flat width as a flat width
With the polo lying flat, take the chest measurement at the position specified by the seller. If no position is stated, ask whether it is taken at the underarms or a set distance below them. Keep the tape straight rather than following a diagonal route between sleeve joins.
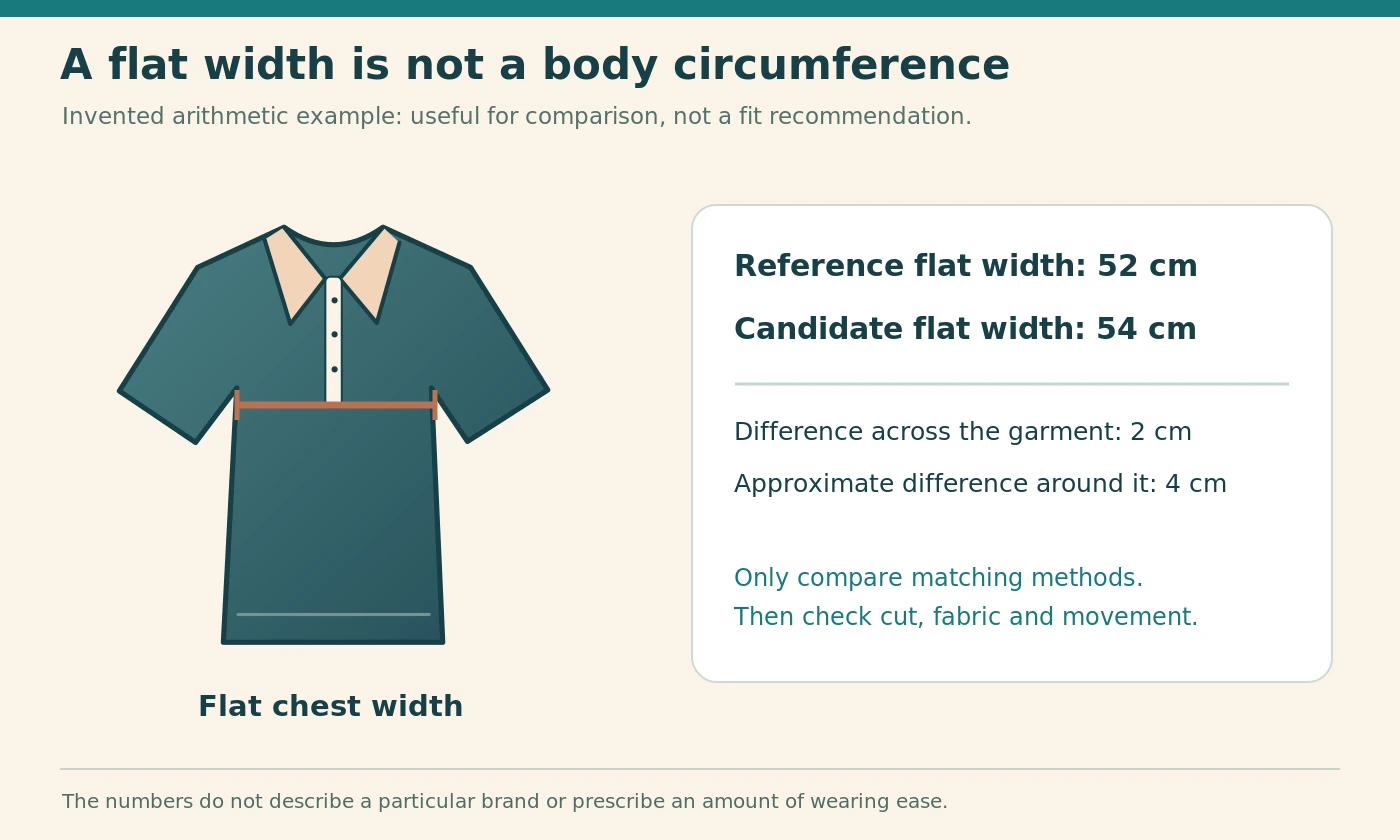
A flat width is not your body chest circumference. Doubling it provides an approximate comparison circumference for a simply laid-out garment, but seams, shaping and fabric behaviour mean that this arithmetic is not a complete fit assessment. Preserve the original flat number in your notes.
Compare widths before converting labels
Suppose a familiar polo measures 52 cm across and a candidate measures 54 cm by the same method. The candidate is 2 cm wider when flat, or approximately 4 cm greater around the chest. Those are hypothetical figures illustrating a comparison, not a recommendation to add that amount.
Now ask whether you actually want more room, whether the fabrics behave similarly and whether the shoulders and length remain suitable. The numerical difference tells you something useful; it does not turn a larger label into an automatic improvement.
Check shoulder shape and sleeve measurements separately
A chest match can hide a shoulder mismatch
Two tops can have similar chest widths but different shoulder seams, armholes and sleeve shapes. Examine the reference garment and the candidate's photographs together. A seam intended to sit near the shoulder and a deliberately dropped shoulder are not the same design problem.
For raglan sleeves, a conventional shoulder-to-shoulder measurement may not be available or useful. Ask for a sleeve measurement with its exact starting point instead of inventing a shoulder seam. Measurements should describe the construction that exists, not force every garment into one template.
Do not mix sleeve-length methods
A sleeve measured from the shoulder seam is different from one measured from the centre back of the neck. A long number on one page may therefore describe the same practical coverage as a shorter number elsewhere. Find the diagram or request clarification before comparing them.
During try-on, check the sleeve while standing normally and while reaching forward gently. Notice whether the cuff interferes with your hand, watch or glove. A neat appearance with your arms hanging down is useful, but it is not the whole course-use check.
Compare body length using the same starting point
Front, back and high-shoulder lengths differ
A back-length measurement from the collar seam should not be compared directly with one taken from the high shoulder point. Likewise, a curved hem may have different front and back lengths. Ask which point the seller used and whether the quoted figure includes the collar.
Record the method alongside the length of your reference top. A small sketch or photograph with the tape in place can make the information easier to reproduce later. This is especially helpful when a seller offers to measure an individual item rather than provide a formal chart.
Think about how you will wear it
A polo intended to remain tucked in needs a different practical assessment from a shorter top worn untucked. Try the intended arrangement rather than judging everything in front of a mirror with the hem hanging freely. Check whether ordinary reaching exposes an uncomfortable amount of the underlying layer.
For midlayers and jackets, consider how the hems overlap. Excess length in every layer can create a bulky stack, while a short outer layer may leave another garment exposed. The aim is a combination that works together, not matching every top to one favourite polo length.
Read the fit description as part of the specification
The cut can change within one brand
FootJoy distinguishes its Traditional and Athletic apparel fits: the descriptions differ in body room, sleeves and hem treatment. Consequently, remembering your size from one FootJoy cut does not settle the choice in the other. Compare the named fit as well as the size label. [2]
The same reasoning applies to any brand offering multiple silhouettes. Write down the complete model and cut rather than only the logo. A regular-fit medium from one collection and a fitted medium from another are separate candidates, even when they share the same colour and fabric description.
Treat marketing adjectives as prompts for checking
Under Armour's men's guide separates several fit categories, including fitted, loose and more relaxed or close-fitting descriptions. These labels explain design intent, but they are not a substitute for the relevant chart and a real movement check. Do not translate them into a universal instruction to go up one size. [3]
Ask which feature worries you. A tight upper arm, short body or loose waist may require a different cut, not a larger version of everything. A targeted comparison usually produces a better shortlist than treating all fit problems as a single small-versus-large decision.
Understand ease without inventing a universal allowance
Ease is the difference, not a compulsory target
For a simple illustrative example, imagine a body chest measurement of 100 cm and a garment chest circumference of approximately 108 cm. The arithmetic difference is 8 cm. This example explains the idea of extra room; it does not establish the correct allowance for golf clothing.
Fabric stretch, shaping, intended fit and the layers beneath all influence how a garment feels. A close-fitting stretch top and a non-stretch outer shell cannot be assessed by applying the same numerical allowance. Use the manufacturer's intended fit and your successful reference garment together.
Do not add the same allowance twice
When a body chart recommends a size, the manufacturer may already have designed the appropriate room into that garment. Adding an arbitrary amount to your body measurement before consulting the chart can lead you towards a size you did not need.
Conversely, an actual garment chart needs to be interpreted as clothing dimensions, not as the maximum body size it will fit. When the distinction is unclear, ask. A seller who confirms the measurement type provides more useful information than a guess based on the word "chest" alone.
Check trousers beyond the waistband label
Waist, rise and seat form one fit problem
A waistband number does not explain where the trousers sit on your body. Two pairs can have a similar measured waistband but different rises, seat shapes and thigh room. Compare a reference pair worn at the intended height rather than pulling either pair into an unnatural position.
For an elastic or partly elastic waist, distinguish relaxed measurements from stretched ones. Do not compare a relaxed figure from one seller with a fully extended figure from another. Nor should you stretch your reference waistband as hard as possible to make a numerical match.
Length is another selection, not a cure for poor fit
Record inseam separately from outseam or total side length. The starting point matters, and the rise contributes to an outseam measurement. A shorter outseam does not automatically mean a shorter leg when the top of the trousers has changed too.
Try sitting, a shallow comfortable bend and a normal walking step indoors. Check pockets with their intended light contents rather than forcing bulky objects into a close-fitting pair. Hem clearance deserves its own practical check with golf shoes, but it cannot compensate for an uncomfortable seat or waistband.
Measure shorts and skirts on their own terms
Keep the reference points visible
Shorts may be described by inseam, overall side length or both. A skirt is more likely to use a front or back length. Copy the description exactly and avoid treating those dimensions as equivalent simply because they all appear under a column called length.
For a skort, ask about both the outer garment and the inner shorts when those details affect your choice. An outer skirt can look comfortable while the inner layer feels restrictive. The measurements needed to resolve that concern are different from a simple waist-size comparison.
Test the intended movement and coverage
Try the garment in the underwear or base layer you expect to use. Check sitting, a comfortable bend to pick up a ball and ordinary walking. These are suggested acceptance checks, not an athletic flexibility test; stop if any movement is uncomfortable.
Consider pocket access and the effect of a belt if one will be worn. A garment that needs constant readjustment during a short indoor try-on is not made more convincing by a familiar label. Choose the cut that works without having to arrange it perfectly after every movement.
Fit outer layers over the clothes they must cover
Assemble the actual layer combination
Try a waterproof or wind layer over the polo and midlayer you realistically expect to wear. A jacket tested over a thin T-shirt may feel very different over a bulkier sleeve. There is no need to add every garment you own; use a plausible course outfit.
Check whether the outer layer compresses or drags the layers beneath as you reach forward. Notice the cuffs, underarms, zip and lower hem. Adjust normal garment controls as intended, but do not rely on extreme tightening to hold a poorly fitting size in place.
Separate adjustable features from the underlying cut
A drawcord can refine a hem, and a cuff closure can change an opening. Neither changes the shoulder construction or creates missing sleeve length. Decide whether an adjustment improves an otherwise suitable fit or merely hides a fundamental mismatch.
For waterproof overtrousers, confirm that the chart applies to the actual product family. Galvin Green's guide includes specifically labelled garment measurements for some waterproof trousers, illustrating why a general trouser body chart cannot be substituted without checking. Follow the selected model's guidance. [1]
Treat units, regions and size conversions cautiously
A UK website can still show another sizing system
Under Armour's UK women's top guide includes US-size references alongside body measurements. That is a useful reminder that the website address or currency does not, by itself, identify the numbering system in a table. Read the column heading before transferring a number from your wardrobe. [4]
Keep a record such as "brand, model, US label, centimetre body range" rather than simply "size 10". The longer description prevents an easy ordering error when another page uses UK, European or letter sizing. Country labels belong to the chart, not to your assumptions.
Convert measurements, not brand promises
One inch equals 2.54 cm, so a measurement can be converted arithmetically. A medium in one brand cannot be converted into another brand's medium by the same sort of exact calculation. The first is a unit conversion; the second is a fit comparison involving design choices.
Avoid rounding repeatedly between units. Keep the original measurement and convert once when needed. A chart with rounded ranges should not be treated as laboratory precision, especially when a seller has measured a soft garment by hand.
Recognise when a chart needs clarification
Missing definitions are a reason to ask
A page that lists "chest 54" without units or method has not given enough information for a reliable comparison. Ask whether it is a flat garment width, a body circumference or another measurement. Do not choose whichever interpretation makes your preferred size appear suitable.
Similarly, question a row that appears inconsistent between centimetres and inches. You do not need to diagnose the website's error. Send the seller the exact product, size, row and unit that concern you, then request a confirmed measurement or a corrected chart.
Use the product-specific answer
A general customer-service statement that a brand is "true to size" does not resolve a missing sleeve measurement. Ask for the particular information that separates your shortlisted options. A photograph of the actual measuring points can be especially helpful for a second-hand or limited-stock item.
Save the response with your order notes. However, recognise its scope: a measurement of one item is evidence about that item, not a universal specification for every season or colour in the brand. Keep your comparison specific enough to remain useful.
Account for fabric without guessing its future behaviour
Compare the relaxed shape first
Stretch content can affect how a garment moves, but it does not justify ordering a size that is uncomfortable before you begin. Compare the relaxed dimensions and intended fit, then assess normal movement. Do not pull a garment to its limit as a substitute for trying it properly.
Likewise, a fabric described as soft or lightweight may still have a cut that does not suit you. Separate material preference from sizing. You can like the fabric and reject the fit without treating the whole product as defective or assuming your measurements are wrong.
Do not buy a washing experiment
Follow the care label rather than planning to shrink an oversized garment or stretch a tight one into suitability. Changes from washing, drying or alterations are not a reliable size-selection strategy. For a purchase that needs professional alteration, ask about feasibility before assuming it is straightforward.
This is particularly relevant when waterproof construction, special seams or bonded details are involved. A simple-looking hem or sleeve may have features that need specialist treatment. Decide on the purchase using the garment as supplied unless a suitable alteration has been explicitly assessed.
Build a comparison sheet with useful columns
Keep the information small but complete
For each candidate, record model, cut, selected label, chart type, relevant body range, actual garment measurements and intended layers. Add a short uncertainty field rather than filling gaps with guessed figures. "Sleeve method unknown" is more useful than a confidently wrong number.
Include your reference garment on the same sheet. That makes the practical differences visible without ranking every item by the largest or smallest measurement. You are looking for the dimensions that solve your own fit problem, not a universally superior size.
Work through one hypothetical comparison
Imagine two jackets with similar chest widths. One has a shorter back and sleeves measured from the shoulder; the other lists centre-back sleeve length and gives no hem detail. The correct next step is to clarify the missing methods, not declare the second jacket longer from its bigger sleeve number.
After clarification, you might find that the first matches your preferred reach but lacks the body length you need. That is a legitimate reason to try a different cut. It is not evidence that all jackets from that brand run small.
Handle borderline sizes without buying blindly
Identify which measurement creates the conflict
A body measurement near a chart boundary does not make every dimension uncertain. You may already know that one size has the right sleeve length but insufficient room over a midlayer. Focus on that conflict rather than automatically increasing every dimension.
Where practical and permitted by the retailer, compare neighbouring sizes in the same model. Keep the layer combination, fastening and movements consistent. A larger size can add unwanted length or looseness as well as room, so evaluate the complete result.
Change the cut when neither option works
When one size binds at the upper arm and the next leaves excessive fabric elsewhere, another cut may be the better answer. Record the reason and move on. Repeatedly ordering the same silhouette in different labels is not always the most efficient route.
The adidas UK size resources distinguish categories and height-related options in relevant charts, another reminder to look beyond a single standard-size ladder. Check the exact category and product availability rather than assuming every garment comes in every length. [5]
Include women, juniors and changing wardrobes accurately
Avoid a men's-chart shortcut
Use the chart for the actual garment category. A women's or junior product should not be mapped to a men's label simply because the letter looks familiar. Shaping, length and intended proportions need their own assessment.
For juniors, assess present comfort and safe, practical movement. A little intended room is a purchasing judgement, but very long sleeves or loose fabric that interferes with use are not automatically sensible future-proofing. Confirm the product's age, height or body-measurement basis rather than assuming age alone decides fit.
Refresh a reference when circumstances change
Measurements and preferences can change over time. A record from several years ago is not more authoritative than a current comfortable try-on. Update the few measurements that matter instead of treating your wardrobe label as a permanent personal identity.
When buying a gift, discreet access to a well-fitting comparable garment can be more useful than guessing from height. However, do not present a surprise purchase as precisely fitted when the intended layers, cut preference and actual measurements remain unknown.
Give second-hand clothing a separate inspection
Ask for current dimensions
For used clothing, request measurements of the actual item and note any alterations. The original manufacturer's chart may help identify the product, but it cannot confirm how the present garment measures after wear and care. Ask the seller to describe the method used.
Look for clear photographs of the label, closures and relevant seams. A size label alone does not confirm the model, fit family or condition. Where an important dimension cannot be established, recognise the uncertainty rather than filling it with a brand stereotype.
Keep condition and fit as separate decisions
A garment may fit perfectly but have wear that makes it unsuitable for your intended use. Conversely, excellent condition does not rescue a poor fit. Make a short note for each issue so that an attractive price does not merge them into one vague impression.
For weather-protective clothing, do not infer present performance from the original marketing description alone. Ask about condition and care history, then judge whether the available information is enough. This article's measurement routine does not test waterproofness or certify used technical clothing.
Run a clean indoor acceptance check
Use a consistent sequence
Before removing tags or wearing the garment outside, review the retailer's current return conditions. Then check the label and model against the order, inspect the item and try it with the intended layers in a clean indoor space. Keep any comparison garments in the same condition.
Stand normally, reach gently, sit and make a comfortable shallow bend. For golf-specific movement, a slow empty-handed rehearsal in a clear space is enough to reveal many obvious restrictions; there is no need to swing a club around furniture.
Decide before explaining problems away
Write one sentence about each concern: sleeve crosses the palm, zip pulls over the midlayer, waistband changes position when sitting, or hem no longer covers the layer beneath. Specific observations are easier to act on than deciding the garment merely feels different.
If the issue is substantial, seek another size or cut while the purchase is still eligible for the appropriate return process. Do not wear an uncomfortable garment for a full round merely to justify the original choice. Measurement-led shopping should reduce uncertainty, not create pressure to keep the result.
Allow for measurement tolerance without losing the comparison
Repeat the method before interpreting a small difference
Soft garments do not sit on a table like rigid engineering parts. A fold at the underarm or a slightly curved waistband can alter the reading. Before deciding that a small difference between candidates is decisive, repeat your reference measurement and check the seller's method.
Use sensible precision. Recording a shirt width to several decimal places does not make the comparison more reliable when the tape position varies. Keep the result useful and describe any uncertainty. A difference you cannot reproduce should not outweigh an obvious improvement in comfortable movement or a clearly unsuitable sleeve.
Ask about individual-item measurements when it matters
When a particular dimension is critical, ask whether the seller can measure the actual item rather than only quote a generic chart. This is particularly useful for altered or second-hand clothing. Request the relevant photograph or method so that the reading can be compared with your own.
Do not expect that one measured item establishes the dimensions of every garment in a production run. The value is narrower: it reduces uncertainty about the candidate you are considering. Retain the appropriate try-on and return checks rather than treating a single centimetre figure as a guarantee.
Distinguish a size problem from a fastening problem
Check the garment in its intended state
Measure and try a zipped top with the zip in the state specified by the seller or intended for wear. A jacket assessed fully open can appear roomy while feeling restrictive when closed over the planned layers. Conversely, tightening every drawcord can make an otherwise reasonable size look smaller than its relaxed shape.
Inspect whether buttons, zips and adjustable closures are correctly engaged before recording the fit. This is a basic acceptance check, not a repair procedure. If a fastening is damaged or will not work normally, raise that condition issue separately rather than treating it as evidence that you need another size.
Compare pocket and waistband behaviour
A belt may refine a suitable waistband, but it should not be the only thing keeping an excessively large garment in a usable position. Likewise, pockets that flare when lightly filled can reveal a cut problem that a chest or waist chart never described.
Try the small items you actually expect to carry, provided this is consistent with keeping the garment clean and returnable. Do not overload pockets to create an artificial failure. The purpose is to check your normal arrangement, such as a marker or glove, rather than test the maximum storage capacity of clothing.
Keep a seasonal outfit record rather than one universal size
Record successful combinations
A short note about a whole outfit can prevent repeated layering mistakes. Record which polo, midlayer and outer shell worked together, including each model and size. Add the practical reason the combination suited you, such as comfortable sleeves or a hem arrangement that stayed in place.
This is more specific than deciding that every waterproof should be one size above every polo. You may use a different combination in mild weather from the one needed over a thicker layer. The successful relationship between those actual garments is the useful information.
Update only what changes
When replacing one layer, compare it within the existing outfit rather than rethinking every item at once. If the new midlayer is bulkier at the forearm, investigate that interaction before assuming the outer shell has become too small everywhere.
Keep old records as context, but mark which combinations you still use. A tidy collection of irrelevant measurements is less helpful than a small current reference. The goal is to make the next purchase easier, not to create a complicated inventory that you will never consult.
Pros and cons of measurement-led shopping
Where it helps
A small measurement record makes remote shopping more deliberate. It helps you ask better questions, recognise different chart types and compare a new item with clothing you already know. It can also prevent repeated mistakes caused by transferring one brand's label to another.
The approach is especially useful when you need a particular sleeve or body length, wear multiple layers or buy from a seller who supplies actual item dimensions. Its value comes from relevant comparisons, not from collecting every possible number.
Where it has limits
Measurements cannot fully describe fabric feel, three-dimensional shaping, movement or personal comfort. A photograph and a chart do not replace an appropriate try-on, and a hand-measured garment figure may not be exact to the millimetre.
Treat the record as a shortlist tool with a final practical check. The best outcome is not a perfectly filled spreadsheet; it is clothing that works for your intended golf outfit without avoidable restrictions or repeated adjustment.
Common mistakes to avoid
Comparing the wrong quantities
The biggest error is matching a flat garment width directly to a body circumference. Close behind it are mixing sleeve methods, using an outseam as an inseam and reading a US number as a UK size because the shop charges in pounds.
Another mistake is adding an arbitrary allowance to a body chart and then choosing a deliberately relaxed cut as well. That can introduce more room than intended without solving the original problem. Keep each decision visible so you can understand the result.
Letting the label overrule the garment
Do not reject a comfortable option merely because it carries an unfamiliar size, or accept an uncomfortable one because it matches the rest of your wardrobe. The label identifies a product version; it is not a grade or a personal target.
Finally, do not assume that washing, forceful stretching, a belt or repeated tugging will fix every mismatch. Those approaches can hide the need for a different cut. A clear rejection during the acceptance check is often a successful part of shopping rather than a failure.
Frequently asked questions
Should I use body measurements or a garment I already own?
Use both, but for different comparisons. Body measurements belong against a body chart. The dimensions of a well-fitting reference garment belong against actual garment measurements taken by a compatible method. Keeping those records separate gives you more useful information than choosing one and forcing it into every website's table.
Is pit-to-pit width the same as chest size?
No. Pit-to-pit normally describes a flat garment width, while a chest size may describe a body circumference or another garment measure. Ask for the method. Doubling a flat width can support an approximate like-for-like comparison, but it does not account for all shaping, stretch or the room you need for movement.
Should I always size up for a waterproof jacket?
Not automatically. The jacket may already be designed for layering, and a larger size can alter sleeves, shoulders and length as well as chest room. Consult the specific chart and try the intended layers. Choose a different cut when increasing the size solves one problem but creates several others.
Why does my usual size fit differently in another collection?
The named cut, fabric and garment purpose may differ. Even within one brand, a traditional and a more athletic fit can be deliberately different. Compare the model and fit description, then use relevant measurements. A single disappointing item does not establish a dependable rule for every product carrying that logo.
Can I convert a European or US size directly into a UK size?
Use the brand's own conversion guidance for that product, then check the body or garment measurements. Generic conversion tables can hide differences in cut and labelling. The safest record includes the original sizing system, selected label and measurement basis rather than reducing everything to one familiar UK number.
What should I ask a seller who has no detailed chart?
Ask for the dimensions that decide your purchase, such as flat chest width at a stated point, back length from a stated seam and sleeve length by a specified method. Include the exact model and size. A focused request is easier to answer accurately than asking whether an item runs big or small.
Can I use an altered garment as my reference?
Yes, provided you record the alteration and compare current dimensions rather than assuming they match the original size chart. A shortened sleeve or hem may describe exactly what suits you. However, it also means a new unaltered item with the same label could differ, so request the relevant measurements before ordering.
Final recommendation
Build a short record around one comfortable, comparable garment and your current body measurements. Before choosing a label, identify whether the destination chart describes the wearer or the clothing, confirm the measuring points and keep the original units visible. Resolve missing definitions rather than guessing them.
Then compare cut, material and intended layers, not just chest or waist. Finish with a clean indoor movement check while the purchase can still be assessed under the seller's return conditions. The most useful golf clothing size chart is the one you interpret correctly and verify against how the garment actually works for you.
Sources and fact-checking notes
Editorial review: 4 October 2026. Named product and service details come from the official sources below. The practical checking routines and hypothetical examples are editorial guidance, not reported hands-on tests. Specifications, availability and terms can change; confirm the exact model or booking before acting.
- Galvin Green – size guideDistinguishes body charts from garment measurements and gives measurement paths.
- FootJoy – apparel fitting guideTraditional versus Athletic cut and relevant chart definitions.
- Under Armour UK – men's topsBody measurement guidance and distinct fit descriptions.
- Under Armour UK – women's topsUS-size references on a UK website illustrate why the chart heading matters.
- adidas UK – size chartsCategory-specific size resources and relevant length options; product availability varies.
Illustrations in this article were created for Taylor’s Trailblazing Golf Gear. Third-party photographs, where used, are credited beside the image or in the source list.